

What is hair masking?
Photoshop grants several tools that help cutting an object out of a photo easily. In model photography, it is most important to keep their hair colorful and gorgeous. In this issue, masks in Photoshop do the same work as real-life masks.
If your hair is looking wispy, tussled, or wild in your photo then you will have to ensure a positive review with that. But if you have Photoshop masking knowledge you may not have to be going in that situation.
So, before knowing hair masking, we should know about what is masking in Photoshop?
What Is image masking?
It is not easy to understand the actual meaning of masking for ordinary people outside graphic design. The simple definition of masking is applying some Photoshop tools in a specific area of an image to hide or reveal something of it.
When the subject of your image has so many turns, curves, complex soft edges, lots of lines, and low details then you don’t ignore this technique to remove the background from the images.
Especially when the subject is smoke, fur, feathers, sweater, blanket, lighting, flames. The best thing about image masking is that it is a non-destructive technique to modify a specific portion of your image.
How to Mask Hair in Photoshop?
- Background Eraser Masking.
- Alpha Channel Masking.
- Clipping Masking.
- Color Range Masking etc.
Step 1:Open the image

First of all, you have to open the photo to mask images in photoshop. To open the photo, go to FILE>OPEN. You will get a windows box from where you will get to search your photo to open it.
Select the required image from windows and click on open. Your photo will be opened in photoshop. You can also import the image by dragging the photo from a folder on windows or desktop.
Step 2: Make clipping path

The clipping path technique is very much important to mask images in photoshop too. We have selected the pen tool for drawing the clipping path. The pen tool is considered the most effective tool for the clipping path.
After selecting the pen tool, draw the clipping path over the subject you have. Remember, you should not leave a single part. We have created a clipping path all over the girl with hair. In the case of masking, hair is the most important part. So, take the hair part fluently.
Step 3: Making the selection
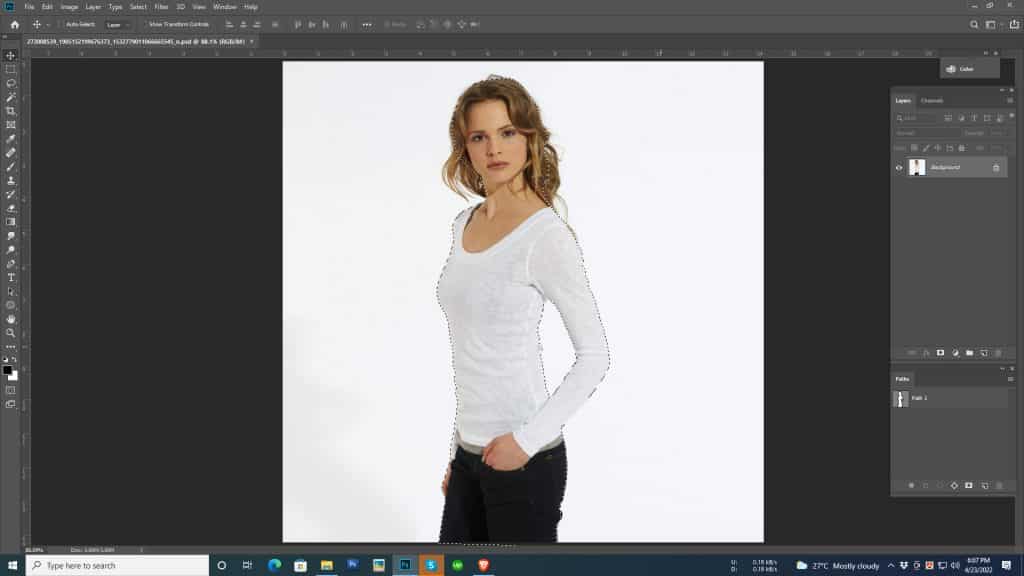
Now, when we have to make the selection of the path area we have created. Click on ‘path1’ and press ‘CTRL + enter’ on a keyboard to select the path.
Doing that, the entire area you have worked on will be selected. You will see moving dots around your subjects which indicates that the selection has been made.
Step 4: Put Feather Around Edges.
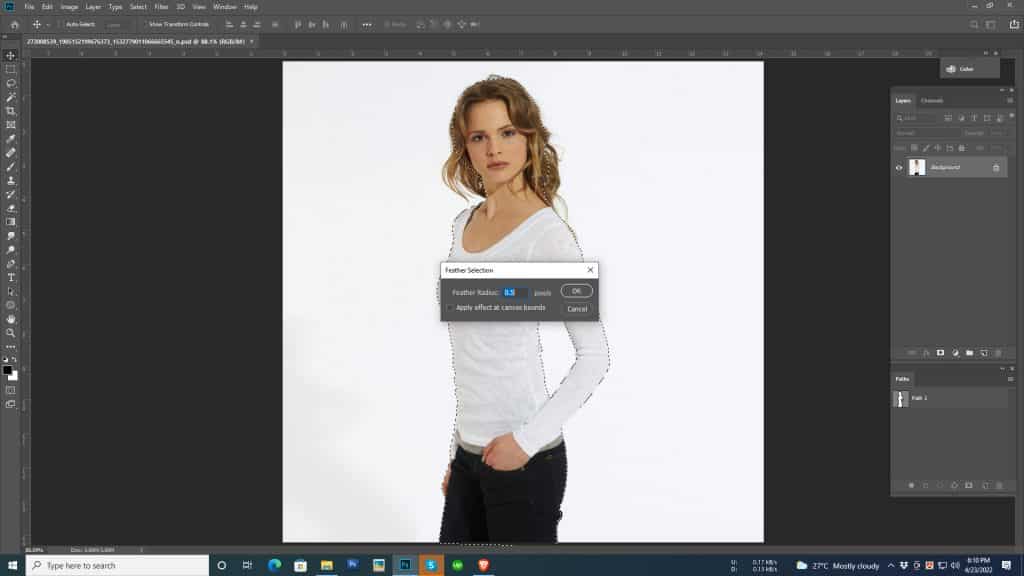
Now we have to take a feather over the photo to work further on hair masking. To take feathers, press ‘SHIFT + f6’ to create the feather.
Creating a feather will help us to take the entire hair. You have to find the feather box to set the radius. Set the radius on 0.5 and press ENTER.
Step 5: Add layer mask
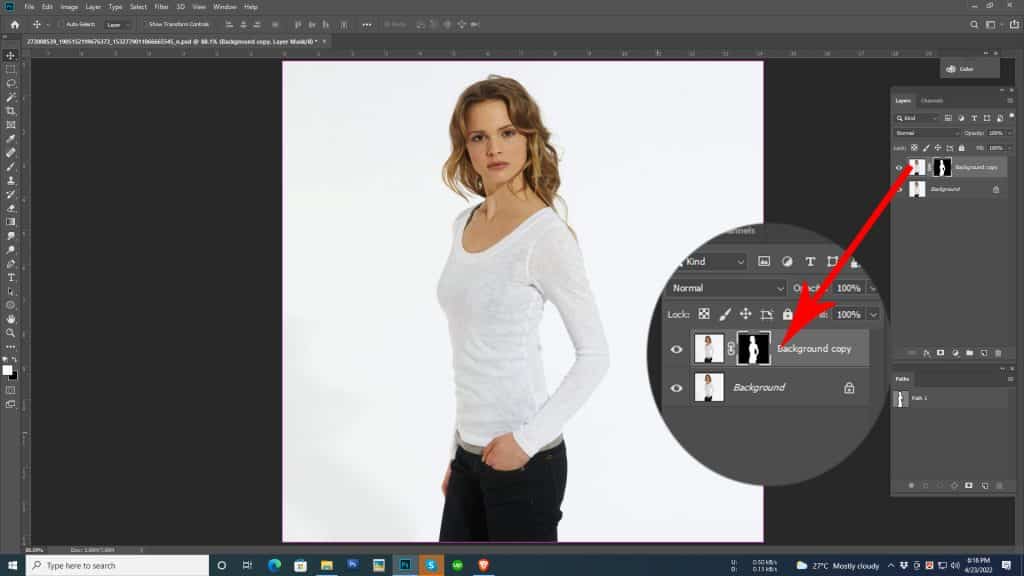
After setting up the number of feathers, copy the background of the main background. To copy the background. Make sure to drop the background down the background layer and put it on the square icon on the right with the delete layer to copy the background. Dragging that, the background will be copied successfully.
After copying the background, the layer mask on it should be added to mask hair in photoshop. You need to add a layer mask to work further on hair masking. You need to go to the layer panel and select the layer from the bottom of the layer panel to add a new layer mask.
The layer mask will be joined with the background layer which will make it easier to work. Many layers are needed for masking a photo. Working with different layers can save your time and also make the job fluent.
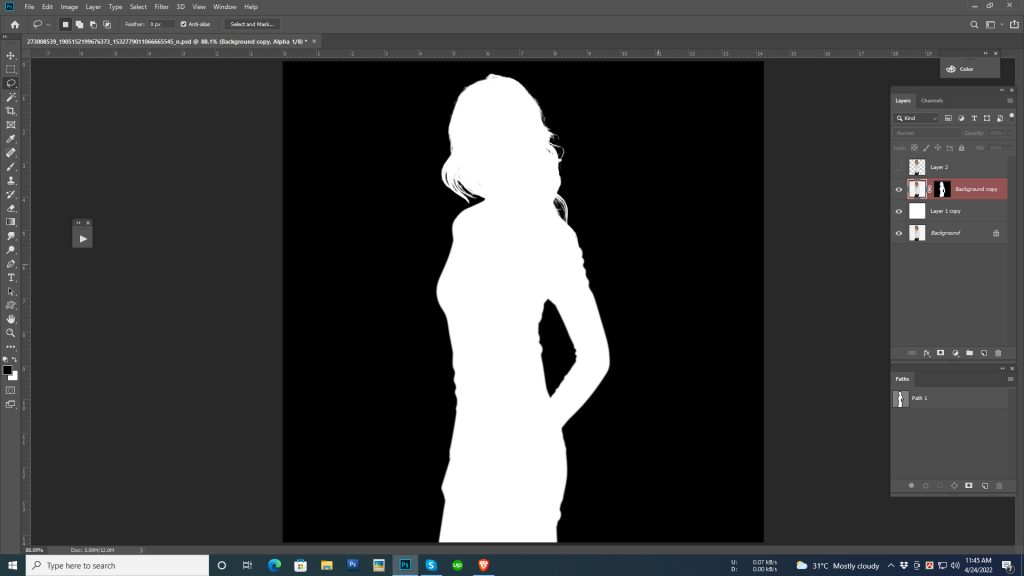
Step 6: Select solid color
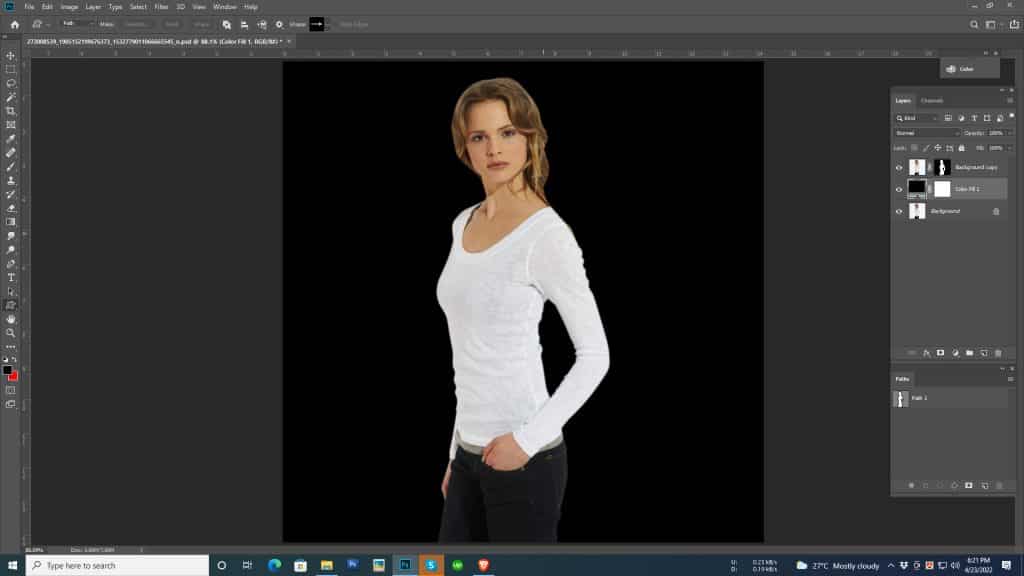
You need to take a solid color for the background to remove the previous one. You have to go to the adjustment layer on the bottom of the layer panel to select a solid color. Click on the circle icon named adjustment layer. While clicking on the adjustment layer icon you will get a dialogue box.
On top of the box, you will find ‘solid color’. You will also get another dialogue box containing different colors. To fill the background with a solid color here we have selected black color. Press enter after selecting the color.
Step7: Make refine mask
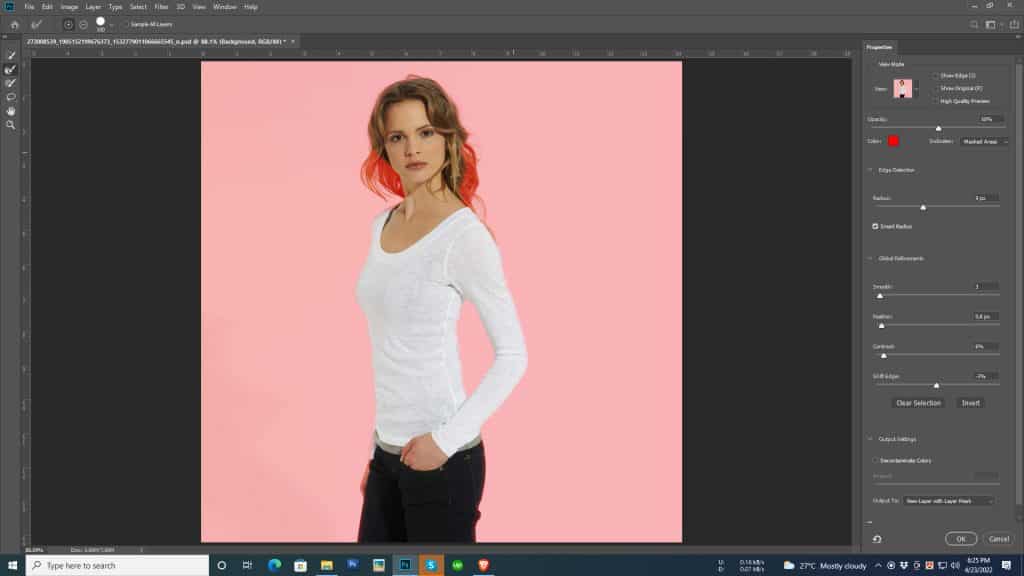
We have got the solid color of the background which is black. Now, it is time to make the refining mask. If you notice that the entire hair of the model has not come in the photo due to the clipping path. A refining mask will help you here to get the whole hair back.
There are two ways of getting the refine mask in photoshop, to get the manual one you should go to the select> refine the edge. By doing that, you will get the dialogue box of refining edge. To find a refined mask in another way is just to press ‘ctrl + alt + R to activate the refine mask tool.
We will make the selection of the layer mask again as we have set the refine mask on the photo and hair. The layer on the background copy on the right from the top, click and press ctrl + alt + click to select by which the selection will be made of the layer mask.
Step 8: Select brush tool
After making the selection of a layer mask, the most important thing is there to go for the brush tool. To activate the brush tool, you have to select the brush tool from the toolbar or press ‘B on the keyboard.
You have to select the overlay brush tool because it will help you to work easily. Increase the size of the brush to work properly. To wash out the whitening part you have to roll the brush tool inside the hair part. Do it until you see the white parts gone.
Step 9: Inverse selection and work with the burn tool

While the inverse selection is being made, you will have to activate the burn tool from the toolbar to make the last work done. On the upper layer of the hair roll over the burn tool. Keep rolling over the burn tool until you see the refined edge of the hair part and then press ENTER.
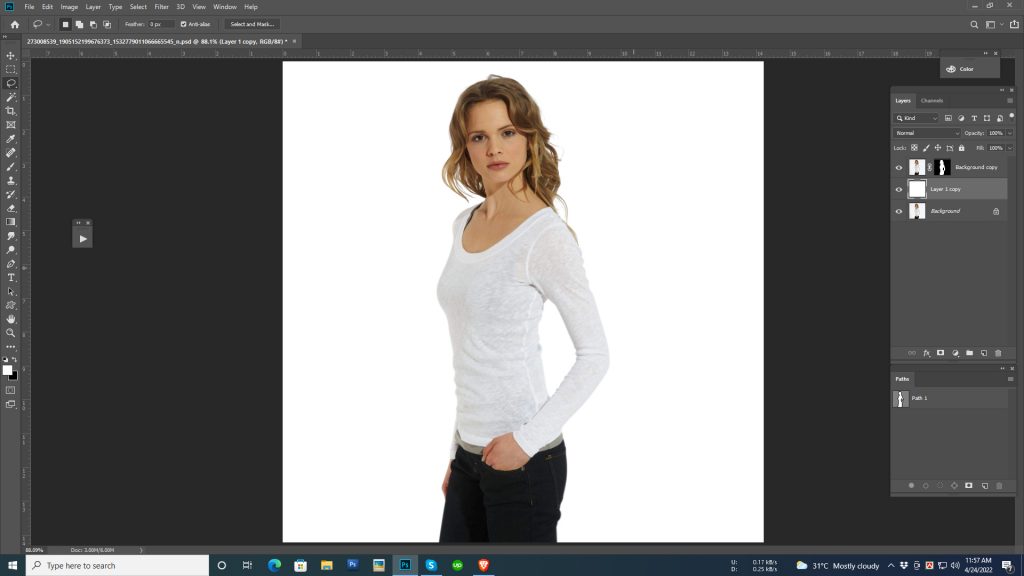
Final Step: Fill the background
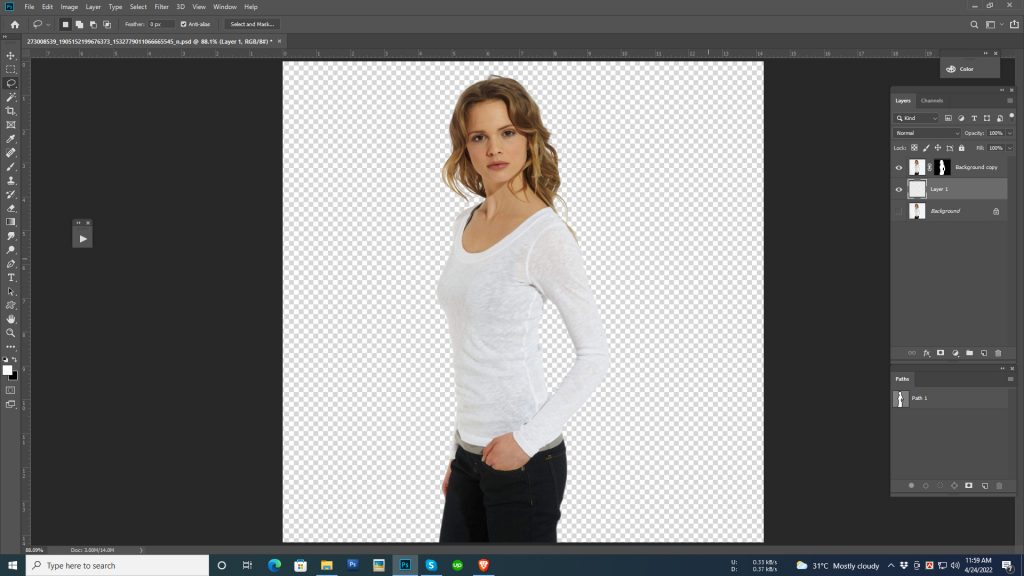
We have got the actual hair parts that were required. Press ‘ctrl + d” to deactivate the burn tool. You can take another solid color in the background. Take your desired solid color and press ENTER.
Video Tutorial
Are you looking for a expert photo editor Team?
Hair masking is a highly recommended step in model photography. It helps to increase the value of your image by giving a natural look to your hair. If you aren’t capable of masking your hair by yourself then you must have to choose an expert with a view to reaching your requirement in the public.
If you need a professional hair masking service then contact Clipping Path Process. We provide the best services of photo retouching, image masking, and clipping path service at your possible rate. So, why not you take a trial from us. We are sure to satisfy you with our services.Contact
